
Blog
10 Great JavaScript Website Interactions to Add Right Now
A website can be attractive, fast, mobile-friendly, and technically perfect, and still feel strangely lifeless.
The difference is often interaction.
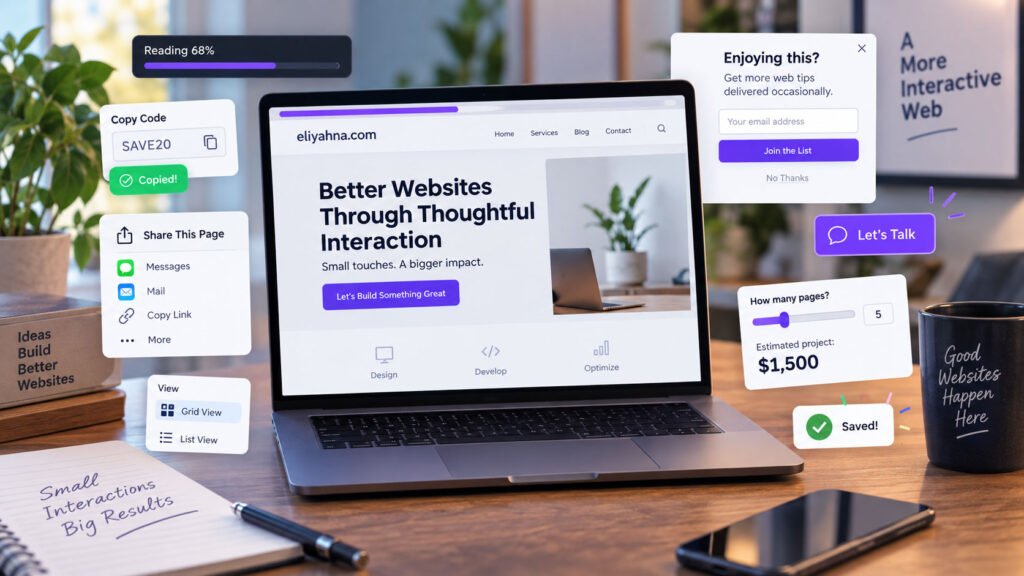
Small JavaScript touches can make a website respond to visitors in ways that feel useful, satisfying, surprising, or simply more polished. A progress bar tells someone how far they have left to read. A button instantly copies information they need. A site remembers a choice they made last time. A call-to-action appears exactly when it becomes relevant.
These are what I think of as sticky interactions: little reasons for visitors to keep clicking, exploring, and engaging.
And you don’t necessarily need React, Vue, a giant animation library, or twenty WordPress plugins to create them.
Here are ten JavaScript interactions you can add to a website right now.
1. Add a Reading Progress Bar
Long articles can feel much shorter when visitors can see how far they’ve progressed.
A thin bar across the top of the page provides immediate visual feedback as the reader scrolls.
First, add the bar:
<div id="reading-progress"></div>Style it:
#reading-progress {
    position: fixed;
    top: 0;
    left: 0;
    height: 4px;
    width: 0;
    background: #7c3aed;
    z-index: 9999;
}
Then add the JavaScript:
const progressBar = document.getElementById('reading-progress');

window.addEventListener('scroll', () => {
    const scrollTop = window.scrollY;
    const pageHeight =
        document.documentElement.scrollHeight - window.innerHeight;

    const progress = pageHeight > 0
        ? (scrollTop / pageHeight) * 100
        : 0;

    progressBar.style.width = `${progress}%`;
}, { passive: true });
It is simple, but it gives readers a tiny sense of accomplishment as they move through your content.
Great for: blogs, tutorials, guides, documentation, case studies, and long sales pages.
2. Reveal Elements as the Visitor Scrolls
Scroll animation doesn’t have to mean objects flying in from eight directions while spinning.
A subtle fade and rise can make a page feel much more responsive.
Give the elements you want animated a class:
<div class="reveal">
    This content will appear as the visitor reaches it.
</div>
Add some CSS:
.reveal {
    opacity: 0;
    transform: translateY(25px);
    transition: opacity .6s ease, transform .6s ease;
}

.reveal.is-visible {
    opacity: 1;
    transform: translateY(0);
}
Then let JavaScript detect when each element enters the viewport:
const observer = new IntersectionObserver((entries, observer) => {
    entries.forEach(entry => {
        if (entry.isIntersecting) {
            entry.target.classList.add('is-visible');
            observer.unobserve(entry.target);
        }
    });
}, {
    threshold: 0.15
});

document.querySelectorAll('.reveal').forEach(element => {
    observer.observe(element);
});
The important word here is subtle.
Animation should draw attention to content, not make visitors wonder whether they’ve accidentally entered a pinball machine.
Great for: portfolios, service pages, product features, statistics, testimonials, and landing pages.
3. Create a Smart Sticky Call-to-Action
Sticky buttons can work very well.
Sticky buttons that cover half the screen from the instant the page loads? Not so much.
Instead, let JavaScript display a call-to-action only after someone has shown enough interest to scroll through part of the page.
<a href="/contact/" id="sticky-cta">
    Let's Talk
</a>
Example JavaScript:
const cta = document.getElementById('sticky-cta');
const footer = document.querySelector('footer');

function updateCTA() {
    const total =
        document.documentElement.scrollHeight - window.innerHeight;

    const progress = total > 0
        ? window.scrollY / total
        : 0;

    const footerVisible =
        footer &&
        footer.getBoundingClientRect().top < window.innerHeight;

    cta.classList.toggle(
        'show',
        progress > 0.35 && !footerVisible
    );
}

window.addEventListener('scroll', updateCTA, { passive: true });
updateCTA();
You can style .show to slide the button into view.
Now your CTA appears after the visitor has read roughly a third of the page, and disappears again before interfering with the footer.
That’s much more contextual than shouting CONTACT US! at someone three seconds after they arrive.
Great for: service businesses, consultations, ecommerce, appointment sites, and lead-generation pages.
4. Add One-Click Copy Buttons
Any time your website contains something a visitor may need to copy, give them a button.
Coupon codes. Email addresses. Commands. Tracking numbers. Configuration values. Account numbers. Snippets.
Instead of making visitors highlight the text themselves:
<code id="coupon">SAVE20</code>
<button class="copy-button" data-copy="coupon">
    Copy Code
</button>
Use:
document.querySelectorAll('.copy-button').forEach(button => {
    button.addEventListener('click', async () => {
        const target =
            document.getElementById(button.dataset.copy);

        try {
            await navigator.clipboard.writeText(
                target.textContent.trim()
            );

            const original = button.textContent;
            button.textContent = 'Copied!';

            setTimeout(() => {
                button.textContent = original;
            }, 1500);

        } catch (error) {
            button.textContent = 'Please copy manually';
        }
    });
});
Notice the feedback after the click.
That matters.
When an interface responds with Copied!, the visitor immediately knows that their action succeeded.
These tiny confirmations make interfaces feel much more polished.
Great for: ecommerce, technical documentation, membership sites, directories, customer portals, and software websites.
5. Give Mobile Visitors a Native Share Button
Instead of displaying six social-media icons everywhere, you can let supported devices open their own familiar sharing interface.
<button id="share-page">Share This Page</button>Then:
document.getElementById('share-page')
    .addEventListener('click', async () => {

        const shareData = {
            title: document.title,
            text: 'Take a look at this:',
            url: window.location.href
        };

        if (navigator.share) {
            try {
                await navigator.share(shareData);
            } catch (error) {
                // User may simply have canceled.
            }
        } else if (navigator.clipboard) {
            await navigator.clipboard.writeText(
                window.location.href
            );

            alert('Link copied!');
        }
    });
On supported devices, visitors can send the page through whatever sharing methods they already use.
If sharing isn’t available, the example falls back to copying the URL.
Great for: blog posts, recipes, products, events, listings, articles, portfolios, and anything people may want to send to someone else.
6. Replace Annoying Instant Popups With an Engagement-Based Dialog
I’m not against popups.
I’m against popups that attack visitors before they’ve even discovered what the website is about.
JavaScript lets you wait until someone has actually engaged with the page.
For example, create a native dialog:
<dialog id="offer-dialog">
    <h2>Enjoying this?</h2>
    <p>Get more web tips delivered occasionally.</p>

    <a href="/newsletter/">Join the List</a>

    <button id="close-dialog">
        No Thanks
    </button>
</dialog>
Then wait until the visitor has both spent some time on the page and scrolled through part of it:
const dialog =
    document.getElementById('offer-dialog');

let enoughTime = false;

setTimeout(() => {
    enoughTime = true;
    checkEngagement();
}, 45000);

function checkEngagement() {
    const total =
        document.documentElement.scrollHeight -
        window.innerHeight;

    const progress = total > 0
        ? window.scrollY / total
        : 0;

    if (
        enoughTime &&
        progress > 0.25 &&
        !sessionStorage.getItem('offerShown')
    ) {
        dialog.showModal();
        sessionStorage.setItem('offerShown', '1');
    }
}

window.addEventListener(
    'scroll',
    checkEngagement,
    { passive: true }
);

document.getElementById('close-dialog')
    .addEventListener('click', () => {
        dialog.close();
    });
This version waits 45 seconds, checks that the visitor has explored at least part of the page, and displays the message only once during that session.
That’s a very different experience from:
WELCOME! SIGN UP! HERE’S 10% OFF! ALLOW NOTIFICATIONS! CHAT WITH US!
before the visitor has managed to read the first sentence.
Great for: newsletters, discounts, consultations, gated resources, downloads, and membership offers.
7. Remember What the Visitor Chose
One of the easiest ways to make a website feel more personal is simply to remember what someone already told you.
Suppose your portfolio lets people filter projects by category:
<button class="filter" data-filter="websites">
    Websites
</button>

<button class="filter" data-filter="branding">
    Branding
</button>

<button class="filter" data-filter="software">
    Software
</button>
You can store their choice:
const buttons =
    document.querySelectorAll('.filter');

function selectFilter(value) {
    buttons.forEach(button => {
        button.classList.toggle(
            'active',
            button.dataset.filter === value
        );
    });

    // Your filtering code would go here.
}

buttons.forEach(button => {
    button.addEventListener('click', () => {
        const value = button.dataset.filter;

        localStorage.setItem(
            'preferredFilter',
            value
        );

        selectFilter(value);
    });
});

const saved =
    localStorage.getItem('preferredFilter');

if (saved) {
    selectFilter(saved);
}
Now when the visitor returns, the site can restore their preferred category.
The same technique can remember:
- list versus grid layouts
- dismissed notices
- font-size preferences
- selected categories
- recently viewed content
- game settings
- interface preferences
- tutorial progress
The key is to use remembered preferences to save people work, not to become creepy.
Great for: web apps, portals, games, directories, dashboards, stores, and content-heavy websites.
8. Add Smooth Transitions When Content Changes
Modern browsers give developers increasingly powerful ways to transition between interface states without bringing in an entire animation framework.
For example, imagine a portfolio grid that can switch between normal and compact views.
<button id="change-view">
    Change View
</button>

<div id="portfolio-grid">
    ...
</div>
Your JavaScript might look like:
const button =
    document.getElementById('change-view');

const grid =
    document.getElementById('portfolio-grid');

button.addEventListener('click', () => {

    const changeLayout = () => {
        grid.classList.toggle('compact');
    };

    if (document.startViewTransition) {
        document.startViewTransition(changeLayout);
    } else {
        changeLayout();
    }
});
Notice the feature check.
If the browser supports the transition feature, visitors get the enhanced effect. If it doesn’t, the layout still changes normally.
That’s called progressive enhancement, and it’s an excellent way to use newer browser capabilities without making your site dependent upon them.
Great for: galleries, filtering systems, product selections, dashboards, menus, tabs, and app-like interfaces.
9. Turn Static Numbers Into an Interactive Calculator
Want someone to spend longer on a service page?
Give them something useful to calculate.
Even a basic estimator can turn passive reading into active participation.
<label for="pages">
    How many pages?
</label>

<input
    id="pages"
    type="range"
    min="1"
    max="30"
    value="5"
>

<p>
    Estimated project:
    <strong id="estimate">$1,500</strong>
</p>
Then calculate instantly:
const pages =
    document.getElementById('pages');

const estimate =
    document.getElementById('estimate');

function calculate() {
    const count = Number(pages.value);

    const basePrice = 500;
    const pagePrice = 200;

    const total =
        basePrice + (count * pagePrice);

    estimate.textContent =
        total.toLocaleString(
            'en-US',
            {
                style: 'currency',
                currency: 'USD',
                maximumFractionDigits: 0
            }
        );
}

pages.addEventListener('input', calculate);
calculate();
Obviously, you’d replace the example numbers with your own formula.
You could build:
- website cost estimators
- savings calculators
- ROI calculators
- calorie calculators
- mortgage estimates
- shipping estimates
- project timelines
- product configurators
- quiz results
The magic isn’t the math.
It’s that the visitor stops reading your website and starts using your website.
That’s an important distinction.
Great for: professional services, financial sites, contractors, SaaS companies, agencies, ecommerce, healthcare, and educational sites.
10. Reward Actions With Tiny Micro-Animations
People like interfaces that acknowledge them.
If someone completes a task, adds something to a wishlist, saves a setting, finishes a lesson, earns an achievement, or submits a form, give the action a little visual payoff.
You don’t need fireworks.
For example:
<button id="save-button">
    Save Favorite
</button>

<span id="saved-message">
    Saved!
</span>
Then:
const saveButton =
    document.getElementById('save-button');

const savedMessage =
    document.getElementById('saved-message');

saveButton.addEventListener('click', () => {

    savedMessage.animate(
        [
            {
                transform: 'scale(.7)',
                opacity: 0
            },
            {
                transform: 'scale(1.2)',
                opacity: 1
            },
            {
                transform: 'scale(1)',
                opacity: 1
            }
        ],
        {
            duration: 500,
            easing: 'ease-out'
        }
    );
});
It’s tiny.
But tiny rewards are surprisingly powerful.
Consider adding a little bounce when something is added to a cart. Let a heart briefly grow when a favorite is saved. Animate an achievement badge when it’s earned. Give a completed checklist item a satisfying checkmark.
Your visitor pressed the button.
Let the website say, “Yep. I got it.”
Great for: almost everything.
The Best JavaScript Doesn’t Call Attention to JavaScript
It’s tempting to think interactive websites need more movement, more animation, more popups, and more effects.
Usually they don’t.
Good interactivity is less about showing visitors what JavaScript can do and more about making the website respond intelligently to what the visitor is doing.
Show progress.
Remember choices.
Provide immediate feedback.
Make difficult tasks easier.
Reveal additional information at the right time.
Reward interaction.
And occasionally add something unexpected simply because it’s fun.
The best result is when someone doesn’t leave your website thinking:
“Wow, that site had a lot of JavaScript.”
They leave thinking:
“That was a really nice website to use.”
That’s the kind of interactivity worth adding.